
How to Replace a Breaker Box
A breaker box, also known as an electrical panel or distribution board, is the heart of your home's electrical system. It is responsible for controlling and distributing the electrical current throughout your house, ensuring the safety and efficiency of your electrical appliances and devices.
Over time, however, breaker boxes can become outdated or faulty, posing potential hazards and inconveniences. Join our circuit breaker installation experts from MSS Ortiz of Raleigh-Durham, NC as we explore the process of replacing a breaker box, providing you with the necessary knowledge, steps, and tools to undertake this important task on your own.
Signs of a Faulty Circuit Breaker Box
A circuit breaker box is responsible for distributing electricity safely throughout your home. However, over time, breaker boxes can develop issues that may compromise their functionality and safety. Recognizing the signs that your home is in need of a circuit breaker repair or replacement is crucial to address potential problems and prevent electrical hazards.
Frequent Tripping of Breakers
Breakers are designed to trip and interrupt the flow of electricity when there is an overload or a short circuit. However, if you find that your breakers are frequently tripping even under normal electrical usage conditions, it could indicate an underlying problem with the breaker box itself. This could be due to an overloaded circuit, loose connections, or outdated breakers that need replacement.
Burning Smell or Scorch Marks
If you notice a distinct burning smell emanating from the breaker box or observe scorch marks around it, it is a serious cause for concern. This could indicate overheating and potential electrical arcing within the box. These signs should never be ignored as they could lead to electrical fires.
Flickering Lights or Power Fluctuations
If you experience consistent flickering lights or notice power fluctuations throughout your home, it may indicate issues with the circuit breaker box. Voltage fluctuations can result from an unstable electrical current, which can disrupt the operation of your electrical devices and appliances. This could be due to loose connections, faulty breakers, or an outdated electrical panel.
DIY Steps for How to Replace a Circuit Breaker
Replacing a circuit breaker should only be done by individuals with proper knowledge of electrical systems and safety precautions. If you are not experienced or comfortable working with electricity, it is strongly advised to hire a licensed electrician for this task.
However, if you have the necessary skills and confidence, here are the steps for installing a new circuit breaker for your home.
Step 1: Ensure Safety Precautions
Before beginning the circuit breaker installation process or any circuit breaker repair, prioritize safety.
Start by turning off the main power supply to your home by switching off the main breaker in the breaker box. This step prevents accidental electrical shocks. Additionally, wear proper personal protective equipment (PPE), including safety goggles, gloves, and non-conductive footwear. Finally, make sure you are working in a well-ventilated area to promote a safe working environment.
Step 2: Gather the Necessary Tools and Equipment
Collect all the tools and equipment required for the circuit breaker installation.
You will need:
- A suitable screwdriver for the breaker box screws
- Wire stripper/cutter
- Voltage tester
- The new circuit breaker matching the specifications of the intended circuit
Having all the necessary tools ready will ensure a smoother circuit breaker installation process.
Step 3: Identify the Circuit
Identify the specific circuit you want to connect the new breaker to. Determine whether it is for a new electrical device or if you're dividing an existing circuit. This step helps you plan the circuit layout effectively and ensures that the new breaker is compatible with the load capacity of the existing electrical panel.
Here's how you can identify the circuit:
- Turn Off Power: Before identifying the circuit, turn off the power supply to the breaker box by switching off the main breaker. This ensures your safety during the identification process.
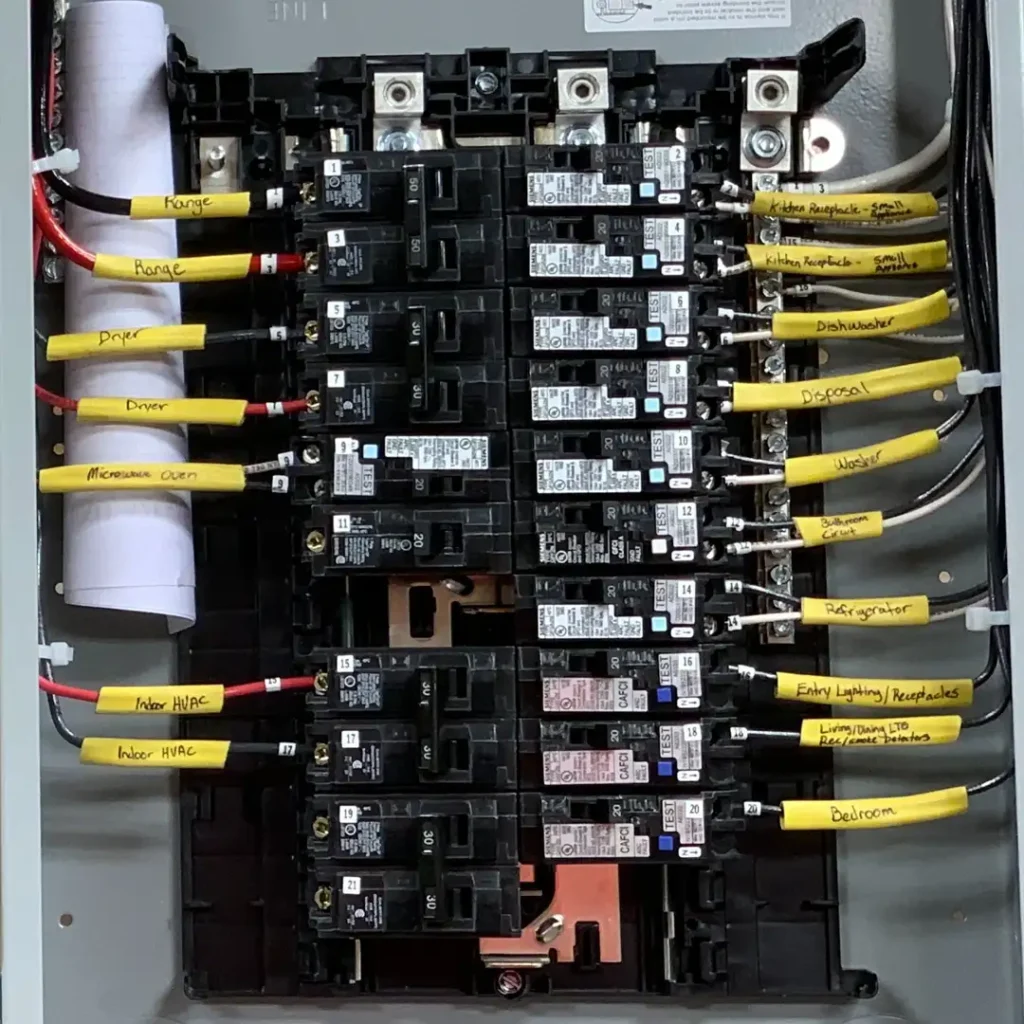
- Check the Panel Labels: Examine the breaker box panel for labels or markings that indicate the different circuits in your home. These labels are typically located next to or above each breaker switch and provide information about the corresponding circuit.
- Use a Circuit Tracer: If the panel labels are missing or unclear, you can use a circuit tracer or circuit breaker finder tool. These tools consist of a transmitter and a receiver. The transmitter is connected to an outlet or a specific circuit, while the receiver helps locate the corresponding breaker in the panel by detecting the signal emitted from the transmitter.
- Test Outlets and Switches: Another method to identify the circuit is to turn off the main breaker and then test each outlet or switch in your home. Use a voltage tester to check whether each outlet or switch has power. By doing this systematically, you can determine which breaker controls the circuit for a specific area or room.
- Label the Circuit: Once you have identified the circuit for the new breaker, label it accordingly on the breaker box panel. This helps ensure that you and others can easily identify and locate the specific circuit in the future.
Remember, if you are uncertain or uncomfortable with any aspect of circuit identification or electrical work, it is always recommended to consult a licensed electrical contractor for assistance. They have the expertise and knowledge to accurately identify circuits and ensure a safe and proper installation.
Step 4: Choose an Appropriate Slot
Select an available slot in the breaker box where you will install the new circuit breaker. Refer to the manufacturer's guidelines or consult a professional if you are uncertain about which slot to use. Proper slot selection is crucial for the efficient and safe operation of the circuit breaker.
Step 5: Prepare the Wires
Prepare the wires that will connect to the new breaker. Use a wire stripper/cutter to strip off a sufficient length of insulation from the wires. Follow the manufacturer's recommendations for the proper stripping length. This ensures a secure and reliable connection between the wires and the circuit breaker.
Here's a detailed breakdown of how to wire a breaker box:
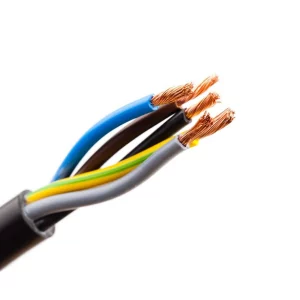
- Identify the Wires: Locate the wires that will connect to the new circuit breaker. These wires may be part of an existing circuit or run from a specific device or area where you want to add a new circuit.
- Strip the Insulation: Use a wire stripper to carefully remove the insulation from the end of each wire that will be connected to the circuit breaker. The amount of insulation to remove depends on the type of connector or terminal used on the breaker. Refer to the manufacturer's instructions or consult an electrician if you are unsure about the appropriate stripping length.
- Use Proper Stripping Technique: When stripping the wires, be cautious not to nick or damage the underlying wire strands. Gently apply pressure with the wire stripper and rotate it around the wire to cut through the insulation without cutting into the conductor strands. Once the insulation is scored, pull it away to expose the bare wire.
- Check Wire Ends: After stripping the wires, visually inspect the exposed wire ends. Ensure that the wire strands are intact and not frayed or damaged. If any strands are broken or damaged, trim the wire back and strip the insulation again to expose the fresh, undamaged wire.
- Twist or Tin the Wire Ends (optional): Depending on the type of circuit breaker you are using, you may choose to twist the exposed wire strands together for a solid connection or apply a thin layer of solder to the wire ends. Twisting the strands ensures a tight connection while tinning with solder can prevent oxidation and enhance conductivity. Note that tinning wires is not always necessary or recommended, so refer to the manufacturer's guidelines or consult an electrician for specific recommendations.
- Keep Wires Neat and Separate: Once the wires are prepared, ensure they are kept neat and separate from each other. Avoid allowing the exposed wire ends to touch each other or any metal surfaces within the breaker box, as this could cause a short circuit.
Step 6: Install the New Circuit Breaker Panel
When considering how to add to a breaker panel, carefully insert the new circuit breaker into the chosen slot in the breaker box. Make sure it is fully seated and properly aligned with the bus bar.
Connect the hot wire (usually black or red) to the terminal of the circuit breaker, the neutral wire (usually white) to the neutral bus bar, and the ground wire (usually green or bare copper) to the ground bus bar. Use a screwdriver to tighten the screws on the terminals securely, ensuring that the wires are firmly and safely connected.
Step 7: Double-Check Connections
After connecting the wires, double-check all the connections. Ensure that they are properly secured and tightened. It is essential to verify that there are no loose or exposed wires, as they can cause short circuits or electrical hazards. Taking the time to review the connections will help ensure a safe and reliable circuit breaker installation.
Step 8: Reattach the Breaker Box Cover
Once you have confirmed that all connections are secure, reattach the breaker box cover. Carefully place it back onto the breaker box, align it correctly, and then secure it with the screws. The cover helps protect the circuit breaker and wiring from dust, debris, and accidental contact.
Step 9: Restore Power and Test
With the cover reattached, it's time to restore power. Turn on the main power supply by switching on the main breaker. Using a voltage tester, verify that the new circuit breaker is functioning correctly and supplying power to the intended circuit. To ensure proper operation, test the connected electrical devices or outlets to confirm that they are receiving the expected power supply.
When to Call a Professional for Circuit Breaker Replacement
Knowing when to call a professional for circuit breaker replacement is crucial to ensure safety and proper installation. While some individuals with electrical experience may be comfortable replacing circuit breakers themselves, it's important to recognize situations where professional assistance is necessary.
Here are some instances when it's advisable to call a professional electrician:
- You lack electrical knowledge
- Your home is equipped with complex electrical systems
- You are upgrading to a higher-capacity panel
- Prioritizing safety and compliance is important to you
- Complex issues need troubleshooting
- Your home insurance requires electrical issues to be handled by professionals
- You want the peace of mind everything is wired and installed correctly
How to Replace a Breaker Box FAQs
Q: Can I replace a breaker box myself?
A: While it is possible to replace a breaker box yourself if you have the necessary electrical knowledge and experience, it is strongly recommended to hire a licensed electrician for this task.
Q: How do I know if my breaker box needs to be replaced?
A: There are several signs that may indicate the need for breaker box replacement. These include frequent breaker trips, burning smells or scorch marks, and flickering lights or power fluctuations.
Q: How long does it take to replace a breaker box?
A: The time required to replace a breaker box can vary depending on factors such as the complexity of your electrical system and the specific requirements of the replacement. In general, a professional electrician may take several hours or even a full day to complete the installation, including necessary preparations, wiring adjustments, and testing.
Q: Do I need any permits to replace a breaker box?
A: Permit requirements for replacing a breaker box vary depending on local building codes and regulations. In many jurisdictions, a permit is required for electrical work, including breaker box replacement.
Q: Will I experience a power outage during the breaker box replacement process?
A: Yes, you can expect a temporary power outage during the breaker box replacement. As a safety precaution, the main power supply to your home needs to be turned off during the installation.
Q: Should I upgrade my breaker box during the replacement?
A: It is a good opportunity to consider upgrading your breaker box during the replacement if your current box is outdated or does not meet your electrical needs. Upgrading to a higher capacity panel can accommodate additional circuits, support future expansions, and enhance the safety and efficiency of your electrical system.
Q: How much does a circuit breaker box replacement cost?
A: The cost of a circuit breaker replacement can vary depending on factors such as the complexity of the job, the specific requirements, and the region, but on average, it can range from $200 to $1,500.
Contact Our Raleigh, NC Circuit Breaker Electricians Today
At MSS Ortiz, our high-rated professionals in circuit breaker installation are prepared to inspect, repair, or replace the breaker box in your home. Our team is ready to ensure the safety and efficiency of your electrical system, alleviating any worries you have about compliance and danger associated with electrical wiring yourself.
If you are looking for an experienced electrician serving the Durham-Raleigh areas of North Carolina, contact us today to schedule a consultation by calling us at (919) 382-0832 or filling out the contact form below to get started.