Circuit Breaker Installation: How to Install a Circuit Breaker
Before you start a DIY circuit breaker installation project, it's important to know what you're getting yourself into. Let's first start by understanding what a circuit breaker is, the reasons you may need a replacement or just a repair, and how to install a circuit breaker. And remember, electrical wiring is no joke. We always urge folks to contact an expert electrician for major upgrades and electrical installations such as this. But if you're set on a DIY approach, keep reading and remember to always practice safety first.
What Is a Circuit Breaker?
When looking at your home’s entire electrical system, it’s important to understand the function of a circuit breaker– housed inside an electrical panel, also known as the circuit box, the circuit breakers connect to and control the power to your home’s electrical systems. Circuit breakers are intended to protect your home from drawing too much power. If there is excessive power, your circuit breaker is alerted and tripped, cutting off power to the device or room controlled by that specific circuit breaker.
Sometimes, however, a circuit breaker may break or you may have the need to install a new circuit breaker to your electrical panel. Our Durham, NC electricians at MSS Ortiz Electrical Services are experts in circuit breaker installations and want to help you learn how to install a circuit breaker for your home.
Reasons for a Circuit Breaker Installation
No one is going to do a circuit breaker repair or replacement just for fun– usually, there will be reasons that you need a circuit breaker installed in your circuit box.
Here are the common reasons you may need a circuit breaker installation:
- The current circuit breaker is faulty: Burn marks, cracks, or a smoky smell are all signs that your circuit breaker and maybe even the entire electrical panel is faulty and old and needs replacing.
- The circuit breakers are worn down: When breakers are worn down, they do not function properly. A good way to check if your circuit breakers are worn are not, is to unplug everything from a circuit and reset the breaker. If the breaker switch does not securely snap into the “on” position, it’s likely you need a circuit breaker replacement.
- The circuit breakers do not meet code requirements: Depending on the age of your home, it’s possible that the circuit breakers or even the entire circuit box are in need of replacements if they are old, out of date, and in violation of code requirements.
- The breaker amperage needs an update: Sometimes a new circuit will need a larger breaker to handle the amount of energy, so you may have to swap a 15-amp breaker for a 20-amp breaker. In cases such as these, the wiring will also need to be entirely replaced, but the repair and replacement begins with the circuit breaker.
- You are installing a new room or system of devices into your home: When you add a new circuit to your electrical panel, a new circuit breaker needs to be installed.
Should I DIY or Hire an Electrician for My Circuit Breaker Repairs or Replacement?
Some circuit breaker replacements and repairs are easier than others. While some of these jobs call for a simple replacement that you can do yourself, when the wiring of your electrical system also needs to be replaced, it is best to contact a local electrician with experience in replacing circuit breakers.
Additionally, if you do choose to DIY your circuit breaker replacement, you should consult with a licensed electrician before doing so, as every circuit breaker is different and there are always unforeseen circumstances that may arise or may be dangerous. Or if you are having any additional issues with your electricity, your electrical outlets, electrical wiring related to your lighting fixtures, or other areas or devices that generate power contact professionals to help.
Steps for How to Install a Circuit Breaker
If you are ready to install a simple circuit breaker switch on your home’s electrical panel, we have the DIY steps for how to repair a circuit breaker. If you are looking for a circuit breaker repair for the main breaker or the entire electrical panel, schedule a professional circuit breaker electrician who is an expert in circuit breaker replacements to come to your home.
Otherwise, let’s continue on to the steps for a circuit breaker repair to remove an old breaker and install a new one.
STEP 1: Mark the Breaker
Using a piece of colorful electrical tape (or whatever electrical tape you have available), mark the circuit breaker in need of repair. Before marking with the electrical tape, make sure you are identifying the correct breaker.
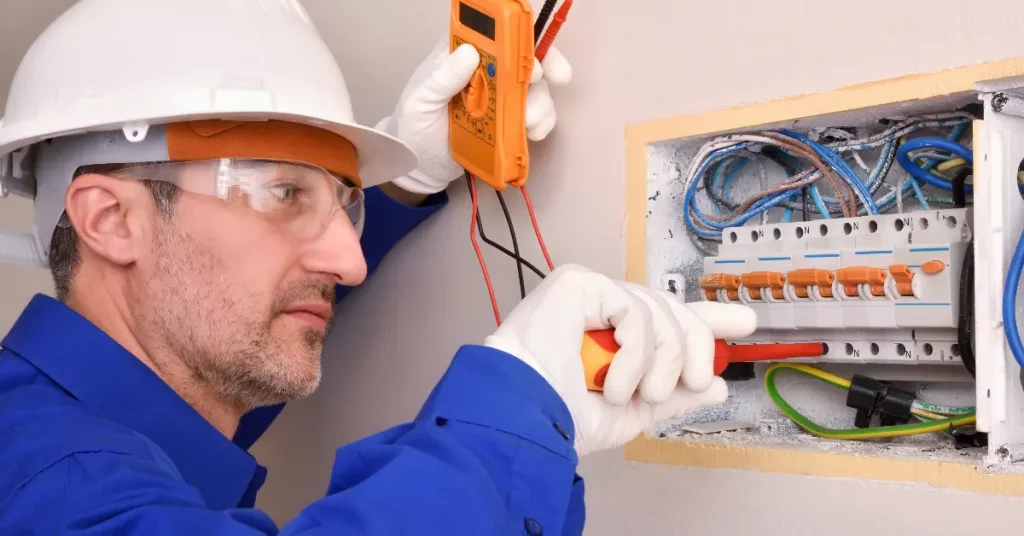
There are some tools you can use for checking if a circuit breaker is functioning or not– a voltage tester allows you to quickly and easily check to see if a breaker is receiving an electrical voltage and you can test if the circuit is receiving an electrical current with an ammeter. By using a multimeter, you can test for both. When you find the breaker you want to replace, shut it off and mark it with tape.
STEP 2: Turn Off the Power
Before moving forward with removing the faulty breaker, be sure to turn off the main breaker, backup generators, or any other equipment breakers for safety.
STEP 3: Remove the Electrical Panel Cover
Once your main breaker is shut off, it’s time to remove the cover to the electrical panel. Carefully remove the top two screws, followed by the bottom two screws, being careful to brace for the weight of the panel as it is removed from the box. Carefully place the panel cover aside with the screws so they are easily accessible when you are done with your circuit breaker repair.
STEP 4: Test the Circuits
Use your non-contact electrical circuit checker tool to ensure that there is no voltage of electricity connected to the circuit breaker. If the circuit checker activates, lights up, or alerts the breaker as an energy source, there is still power generated to that circuit.
If this is the case, it is vital to resist proceeding and wait for a circuit breaker inspection from a professional, licensed electrician.
If the breaker is not receiving power and this is confirmed by your circuit checker tool, you may proceed to the next step.
STEP 5: Remove the Breaker’s Wire
After confirming that the main breaker is turned off and there is no power going to the circuit breaker, you can use a screwdriver to loosen the wire that is on the back of the tape-marked breaker from the screw-down terminal on the breaker. Loosening this black wire is sufficient, as the entire screw does not need to be removed, you just need to be able to pull the wire entirely out of the breaker.
STEP 6: Take the Old Breaker Off the Panel
Use your thumb to apply a good amount of pressure on the breaker to remove it from the panel. Sometimes they can feel stuck, so a good amount of pressure might be needed, particularly if this breaker has remained in place for decades. The breaker will begin to slide off of the copper bar (called the “hot bus bar,”) in a rotating motion, eventually becoming completely removed from the panel.
STEP 7: Install the New Breaker
Ensuring your new breaker is set into the “off” position, you then will take notice of the new breaker– one side has a hook-like shape at the end of it, while the other side has copper contact points with lubricant. Do not remove the lubricated grease, as it is purposeful. Position the hooked end of the breaker so that it hooks into the panel, carefully rocking the breaker into place so it is snug and lined up with the other breakers in the box. Double-check that it is secured into place.
STEP 8: Wire the New Breaker
Confirming that the circuit breaker is still in the “off” position, connect the neutral wire (white) and the hot wire (black) to the breaker. Loosen the breaker’s screw and connect the breaker to the corresponding terminal locations, tightening the screws until it is secure.
If at any time you are concerned or confused, it’s best to contact a local circuit breaker electrician to professionally install your breakers.
STEP 9: Replace the Electrical Panel Cover
With your new breaker installed and the wires attached, tuck all of the wires neatly inside the breaker panel box. Find the panel cover that you set aside earlier and using the existing screws, screw the panel cover back into place.
STEP 10: Turn the Power On
Flip all of the circuit breakers into the “off” position. Turn on the main breaker power, and turn then, one by one, flip each circuit breaker into the “on” position. Your new circuit breaker should be working if the DIY installation was a success. If you are experiencing further issues with that circuit, contact an electrician to come to inspect your electrical panel and circuit breakers.
Contact Our Circuit Breaker Installation Electricians Today!
Remember that even after the circuit breaker installation is complete and works as it should there still might be issues that are not immediately apparent. If something is not connected or wired properly, there could be major repercussions including short circuits or even fires. While these circuit breaker installation tips may serve you in your DIY wiring project, we still urge you to contact an electrician for this type of electrical installation.
Are you in need of a professional electrician to help with either a circuit breaker repair or a circuit breaker replacement? MSS Ortiz Electrical Services in Durham can help install your new circuit breakers. While we are headquartered in Durham, North Carolina, our licensed electricians are spread across the state and will travel to the surrounding areas including Raleigh, Greensboro, Apex, Pittsboro, Holly Springs, Cary, Garner, and more!
Contact us today at (919) 382-0832 or by filling out our form for a consultation on the electrical panel and circuit breaker installation for your home.